

Installing a vinyl liner pool is an exciting way to enhance your outdoor living space, especially if you’re looking for a customizable and budget-friendly pool option. Understanding what to expect during the installation process can help you feel more prepared and confident. Today, we at Metropolitan Pools would like to offer a breakdown of the steps involved from start to finish.
Initial Consultation & Design
The first step is meeting with your pool contractor to discuss your vision, yard space, and budget. During this phase, you’ll select the shape, size, liner pattern, and any optional features like tanning ledges, lighting, or steps. Your contractor will likely assess your property for slope, soil quality, and accessibility for construction equipment.
Permits & Site Preparation
Once the design is finalized, the necessary permits must be obtained based on your local building codes. Your installer usually handles this part, ensuring the project complies with safety and zoning regulations. After permitting, the site is prepped by clearing the area of vegetation, debris, and obstacles.
Excavation
Excavation is the first major construction step. The installation team will dig the hole according to the dimensions of your pool. This stage may take a day or two depending on soil type, weather, and equipment access. The bottom of the pool is shaped and leveled, forming the base for your liner.
Wall & Base Construction
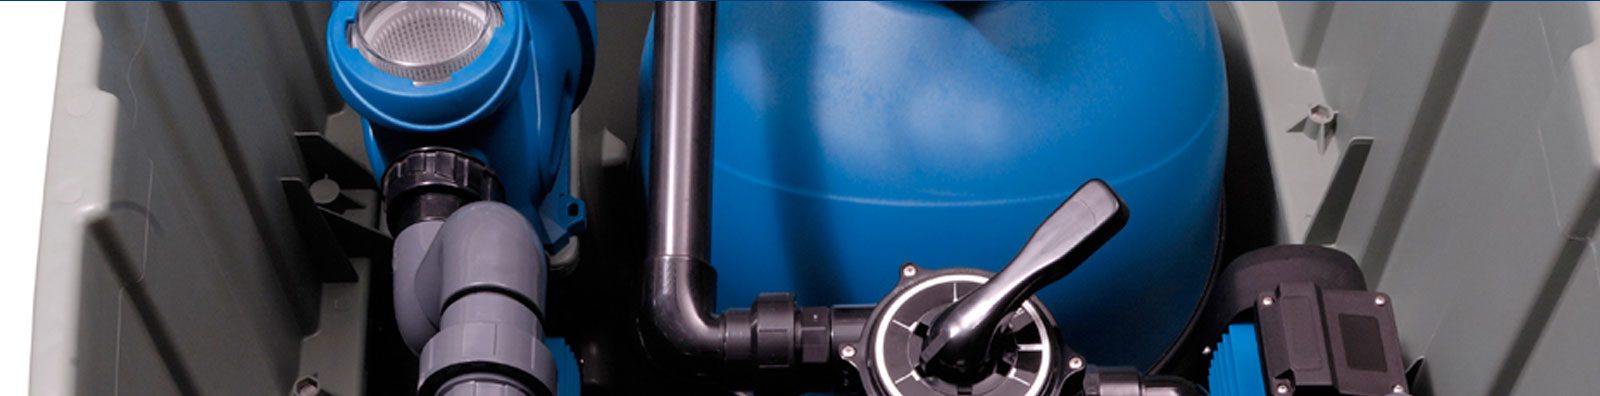
Next, the pool walls, usually made of steel or polymer panels, are assembled and anchored into place. Once the walls are set, the pool’s bottom is finished using a mixture of sand, vermiculite, or concrete to create a smooth surface. Skimmers, returns, and other plumbing components are installed at this time.
Vinyl Liner Installation
After ensuring the walls and floor are properly prepped, the vinyl liner is installed. It’s carefully fitted into place to avoid wrinkles and aligned with the pool structure. A vacuum is used to suck the air out and help the liner conform perfectly to the shape of the pool. This part requires precision to avoid long-term issues.
Filling the Pool & Final Setup
Once the liner is secure, the pool is filled with water. The water pressure helps set the liner firmly against the pool floor and walls. Plumbing and filtration systems are connected and tested to ensure everything is functioning correctly. Any additional features, such as lighting or steps, are completed during this phase.
Cleanup & Landscaping
The installation team will clean up the construction site, backfill around the pool, and grade the area for drainage. Some homeowners choose to complete landscaping or deck installation after the pool is installed to finish off the outdoor space.
Vinyl Pool Installation, Repair, Maintenance & More in Sandusky, Lorain, Elyria, Medina, Parma, Mentor, Akron & Greater Cleveland, Ohio
Vinyl liner pool installation typically takes 2 to 4 weeks from excavation to water-ready, depending on weather, permitting, and complexity. With proper planning and a trusted installer, the process is smooth and efficient. Choosing a vinyl liner pool gives you the benefit of a beautiful, flexible design that’s easy to maintain and perfect for backyard fun. Call Metropolitan Pools if you are interested in vinyl pool installation.